Guide to Google Search Console
Understanding What Google Search Console Is
Google Search Console, formerly known as Webmaster Tools, is a tool that provides insights from Google about your website and how it is discovered, viewed and how it can be improved. These insights are invaluable for an effective organic SEO strategy and should be used in conjunction with Google Analytics to get higher rankings and better traffic to your site.
Adding Your Site
New users will have to add and verify site ownership before they can access any information that Google Search Console may have to offer. It is incredibly important that Google keeps this sort of detailed information about a site’s performance for only the site owner or authorized user. Google can’t, and shouldn’t, hand out every site’s information to just anyone. There are many tools out there that can approximate the type of information that Google will give you in Google Search Console, but this is the most authoritative one as it is the actual source letting you know what is happening. SEM Rush, Ahrefs, Spyfu, Majestic SEO and Moz are just a few of the top approximators out there that can also provide additional insights to help supplement your SEO analysis.
First, you’ll need to login to your Search Console Account using a Gmail account. If you own multiple websites, we would suggest keeping all of your Google products under that same email login allowing you to easily switch between accounts.
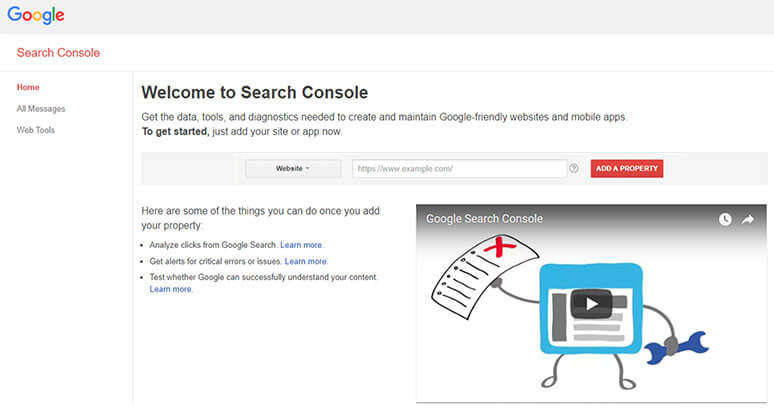
Next, you will need to enter the URL of the website that you are trying to claim and click the red “Add A Property” button. The best way of doing this to ensure you are claiming the correct version of the site is to type in the URL of your site into a browser, copy and paste that section into the site. This becomes very important because there are 4 potential versions of a site and if you claim the wrong one you won’t get the insights you need. Without getting into too much detail, each of these “counts” as site and need to be claimed independently of each other.
- https://www.example.com
- http://www.example.com
- https://example.com
- http://example.com
Best practice for SEO is to make sure each of these potential versions resolves to a singular style. It doesn’t really matter which version you go with but our recommendation is that you should get a SSL certificate to keep up on the latest from Google.
In the screenshot below you can see a highlighted section where you would look to find which version your site currently has.

Verifying Your Site
Next you’ll be asked to verify your property. This can be done in a few different ways, some are easier than others depending on your experience level.

To verify your ownership, Search Console will give you a “Recommended Method”, which varies from site to site, but there are four other alternate methods as well. In this case, they recommend using your domain name provider. It doesn’t matter which of the five methods you actually use, so long as you do it properly.
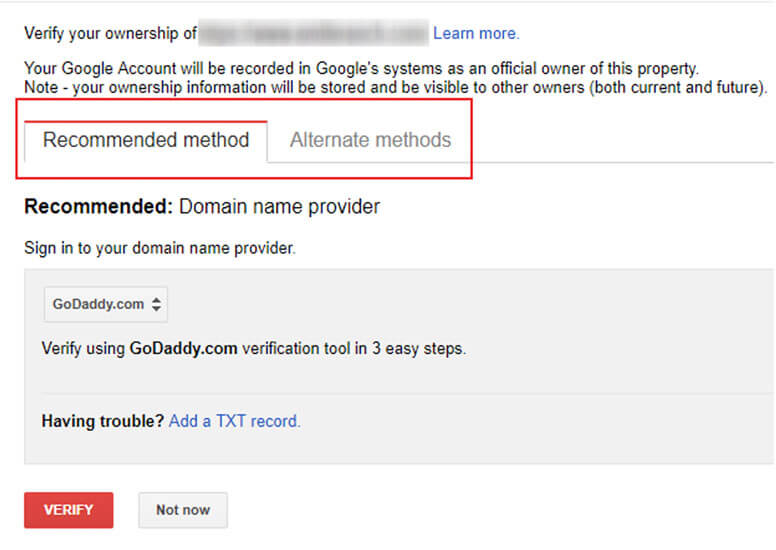
Adding Via Domain Name Provider
We have found that the domain name provider is one of the more difficult methods and so we don’t typically recommend this method. Your domain name provider is typically where your website is hosted, and where you purchased the domain name. Each domain name provider has a different method to verify ownership so you’ll have to walk through the steps provided by Google to verify your ownership of the site.
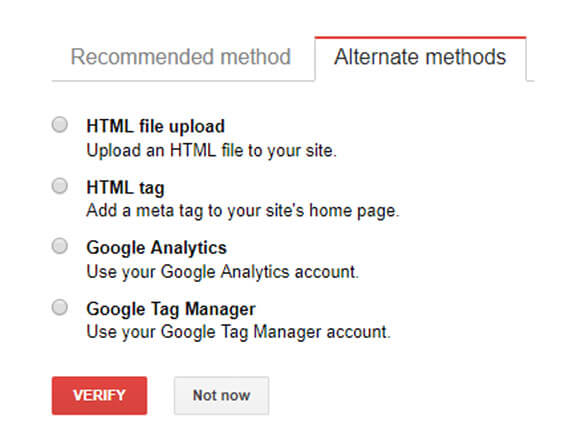
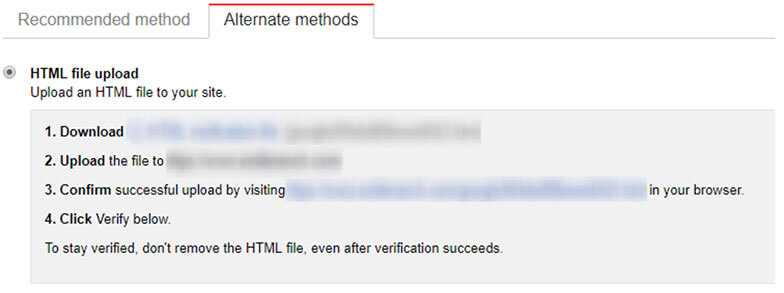
Adding Via HTML File upload
If you have access to the site’s root directory you can upload an HTML file to prove your ownership of the site. You’ll need to follow the instructions, which can vary slightly from site to site. It is very important that you don’t ever remove this HTML file because it will cause your site become unverified.
Adding Via HTML Tag
If you have access to the site and are familiar with site code, you can upload an HTML meta tag to the site’s home page. Copy the code and be sure to place it within the head section. It doesn’t matter where it is placed so long as it is visible within the head section, as shown in the example. Never delete this code from your site as your site will become unverified.

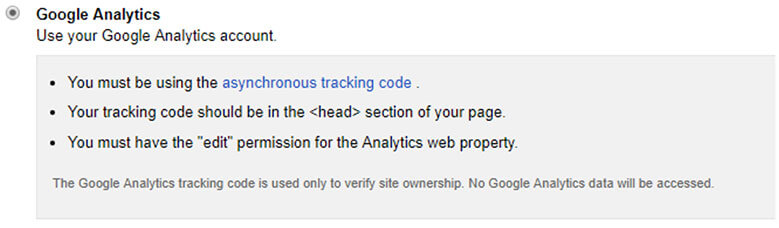
Adding Via Google Analytics
If you are already using Google Analytics this is the easiest option. Sign in to the same Gmail account as you are setting up Google Search Console, and follow the three requirements below for the GA Code. You then just have click verify and you are all set. You should never remove the GA code from your site, or your site will become unverified AND you will lose analytics data.
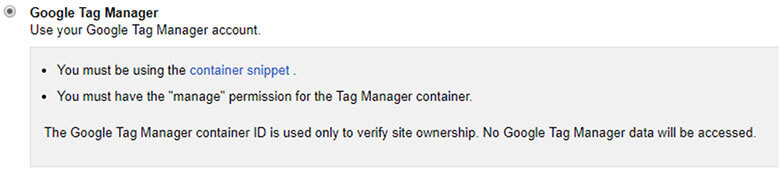
Adding Via Google Tag Manager
If you are already using Google Tag Manager this is the easiest option. Sign into the same Gmail account as you are setting up Google Search Console, and follow the requirements below. Then, simply click “verify” and you are all set. You should never remove the GTM code from your site, or your site will become unverified AND you will lose your data.
Linking Google Analytics and Google Search Console
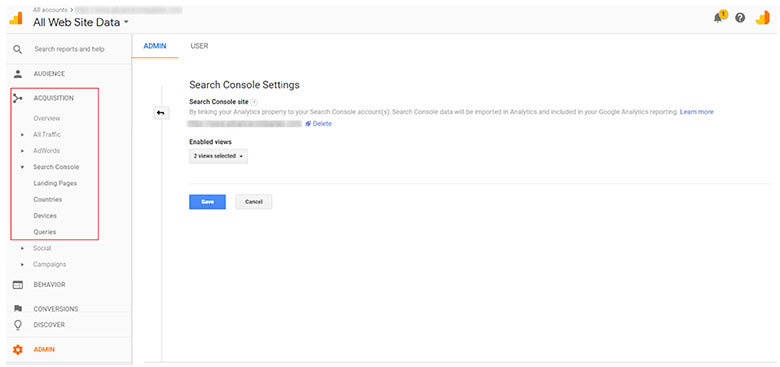
After you have verified your ownership of a site you will then have access to the Google Search Console Dashboard. You’ll want to associate it with your Google Analytics account in order to maximize the data for your marketing decisions. Google Analytics does a great job of getting you information about who is visiting your site. Areas we frequently use to help drive our decisions include audience demographics, geographic location, source of traffic (social, organic, paid, etc), conversions and other useful information. Google Search Console gives you more of a technical overview of how your site is performing, how your sites look in the search results page, if there are any problems Google has detected, and for what keywords your site shows up organically.
To associate the two properties you’ll want to click the gear icon in the upper right hand corner and select Google Analytics Property.
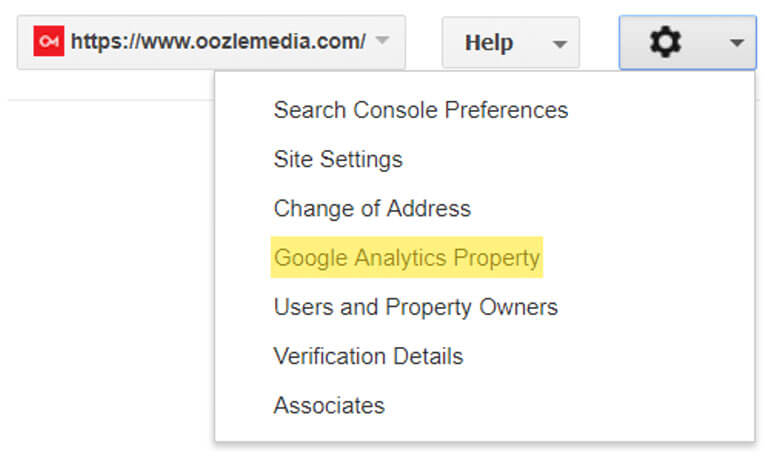
Once you click that you’ll come to this screen. Select the analytics property that you want to associate with this account.

Then click save:

This will bring up a warning and you’ll just need to click “OK” and voila!

You’ll now be able to see better data in Google Analytics and Search Console. For the main differences between the two, you’ll want to refer to Google’s support section.
Set your Site Settings
Next you’ll want to set your site settings, once again under the gear icon in the upper right hand corner.
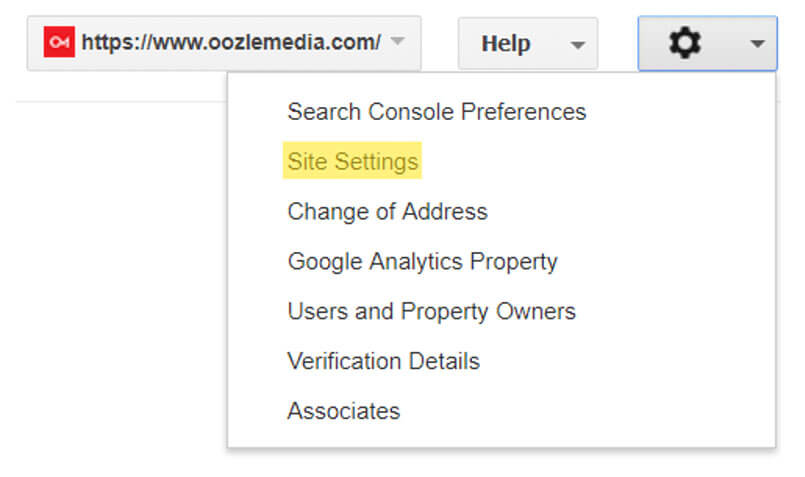
In this section you will set how you want your site to display when someone discovers you using Google.
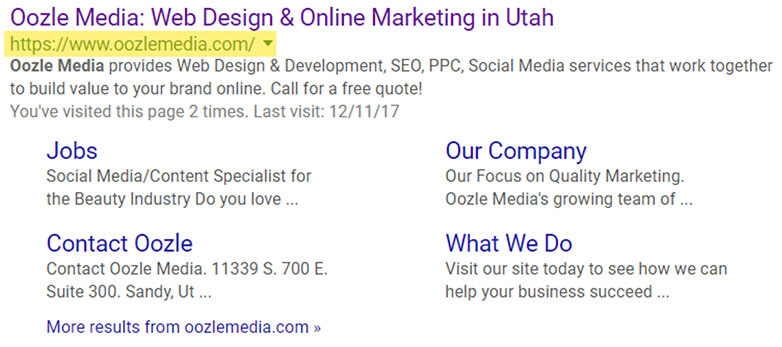
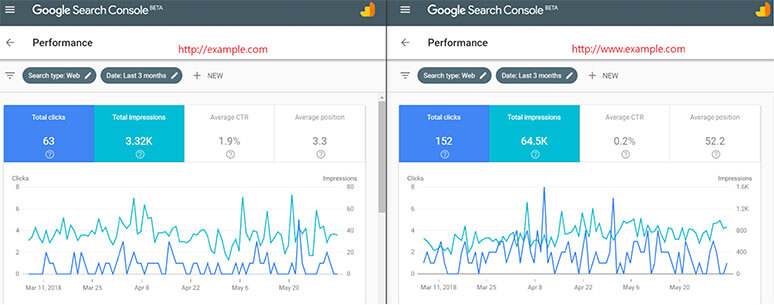
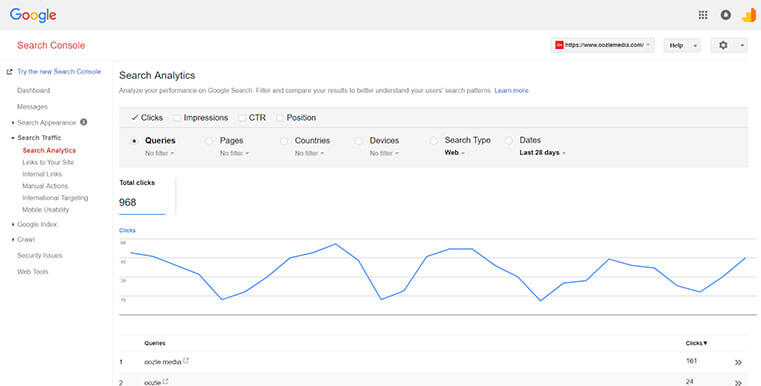
It really doesn’t matter too much which display URL you use, but we do suggest picking one or the other to avoid problems in the future. As discussed earlier, there are 4 potential versions of your site and you should make sure they all resolve to one consistent format via 301 redirects. (e.g., http://oozlemedia redirects to https://www.oozlemedia.com). This will make sure to avoid duplicate content issues, loss of rank due to losing valuable links, etc. Additionally Google Search Console will only show data for the Search Analytics section based off of which version of the site is displayed. If you set the display version to show consistently as your preferred version, you’ll be less likely to split your data between two versions of the site as seen below:
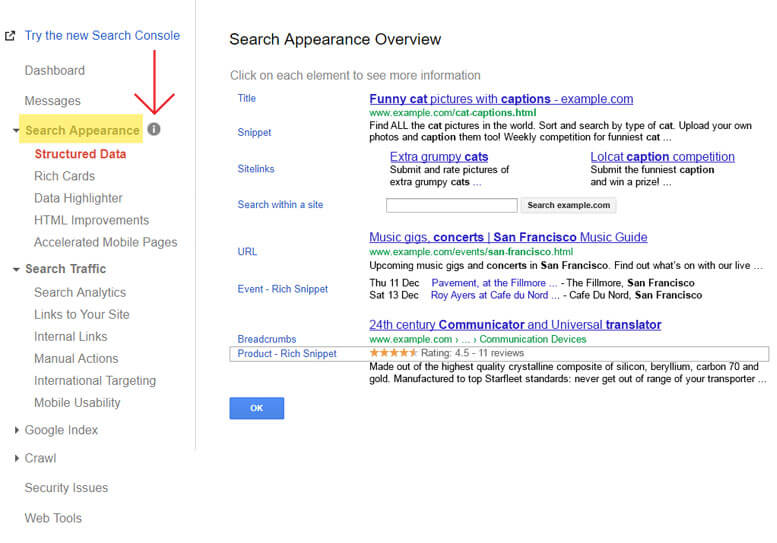
Search Appearance
The search appearance section refers to how your site shows up within a search engine results page (SERP). If you click the little ‘i’ next to Search Appearance, Google has a really nice breakdown of different examples of how your site can appear on any SERP page.
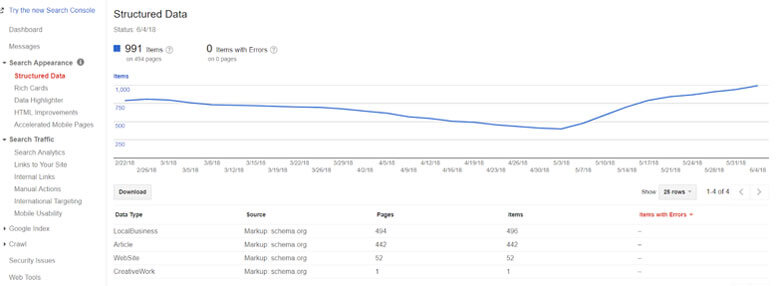
Structured Data
Structured Data refers to schema markup that is found on your site. Schema markup in essence is a collection of HTML tags or JavaScript that search engines can use to highlight the most important parts of your website such as your company name, address and phone number. If you want a quick introduction, check out our blog “Schema and You”.
On this screen you’ll be able to see which pages have schema markup and if there are any errors on those pages that are marked up. You can also go to Google’s Structured Data Testing Tool to find any errors on a page by page basis and it will show you directly in the code where you have problems. If you go to chapter four of Backlinko’s Guide it’ll also show you a good walk-through on these fixes. There is no guarantee that your schema will show up, but it definitely won’t show up if it isn’t there at all.
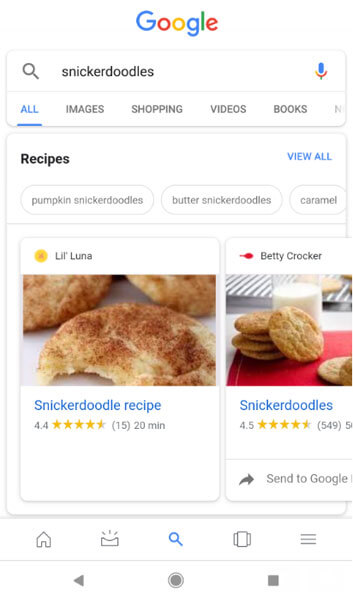
Rich Cards
This is almost exclusively used for recipes. If you want a full write-up on it, head on over to Google’s blog. You can also use it for “events, products, or opportunities on your website.” You can use this section much like you would on the structured data section.
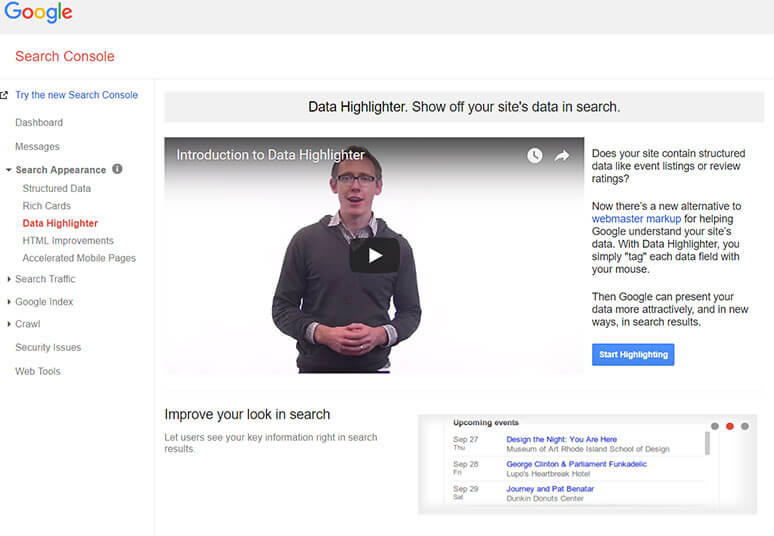
Data Highlighter
As the site says here, “It’s a new alternative to webmaster markup for helping Google understand your site’s data.” If you are more of a visual person, this can help with finding opportunities to add schema markup.
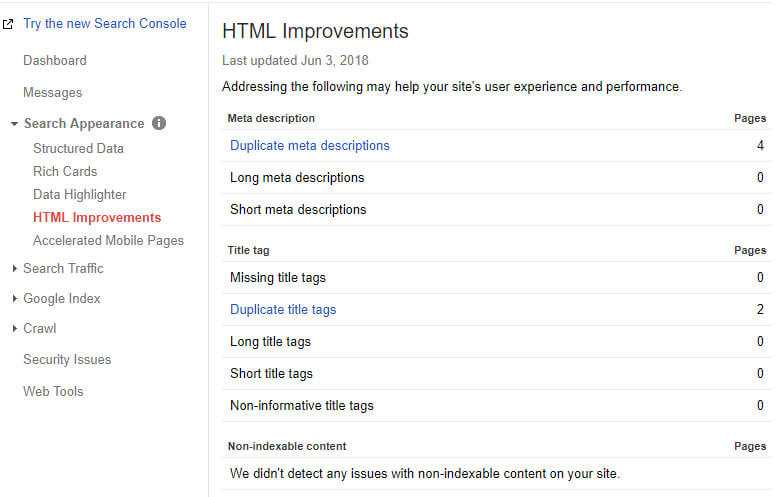
HTML Improvements
Here is a great area to help boost your SEO by knowing where you can make changes to your title tags and meta descriptions. You’ll want to have a unique title tag and meta description on an individual page basis, especially on important pages you are trying to rank for keywords. Title tags and especially meta descriptions are constantly changing with how long they should be, and what the best practices are for that. We recommend monitoring this for your unique situation because every search can be different. Leading industry leaders like Moz have great guidelines to follow.
These can be easy fixes that can really help your site gain traction in rankings. If you click on anything highlighted in blue, it’ll give you a list of all the pages that have that problem.
Accelerated Mobile Pages (AMP)
Accelerated Mobile Pages or AMP keeps track of all pages that have been modified for AMP and lets you know of any known issues. AMP pages are a extremely minimal, lightning fast pages on your site. It is an open source language that has gained popularity with many news sites in particular and is indicated by the little lightning bolt icon in Google search.
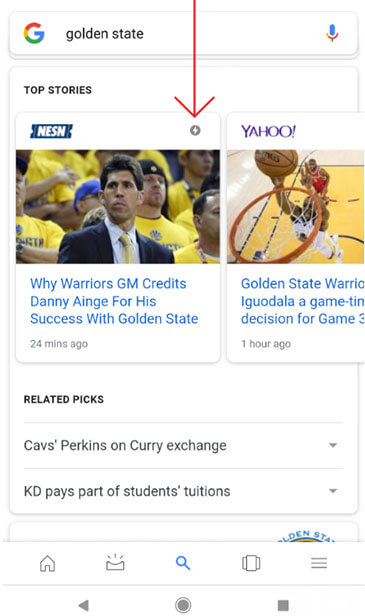
If you publish blogs on a regular basis, it may be a good idea to invest in AMP and you can track them in Google Search Console.
Search Traffic
The Search Traffic section gives you some insights into a few things that matter for your website with Google’s algorithm, namely:
- Keywords
- Backlinks
- Internal Links
- Spam
- Targeting
- Mobile Friendliness
If you’ve done anything related to SEO you’ll recognize that these a few of the most important pillars of fundamental, white hat SEO work.
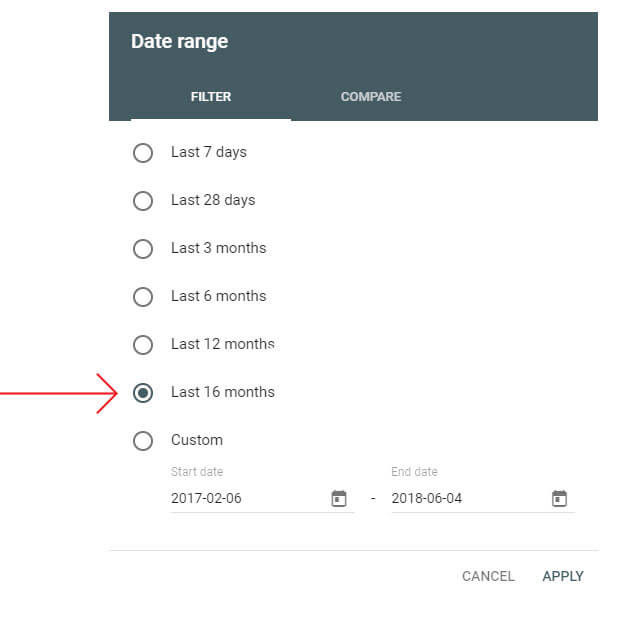
Previously we were only able to see up to a maximum of 90 days worth of data. With the release of the new Search Console you are able to go back at least 16 months, sometimes even longer, depending on the site. This opens up the opportunity to analyze year-over-year data and the ability to look for long-term trends.
Links to Your Site
This is the all important backlink section of Google Search Console, as external backlinks are still one of the strongest ranking factors an SEO can find. This will show you who is linking to you the most, which pages are receiving the most links, and what sorts of words other sites are using to link to you. However, this is a just a sample of the links you are receiving to the site. Google will never give you the full list of links to your site, as someone may be able to extrapolate more information about their algorithm and be able to game the system. Additionally, if you do acquire more links to your site, Google is notoriously slow in showing them.
For more on the reliability of webmaster tools, including other sections I’d refer to some tests run by Russ Jones back in 2017 for Moz.
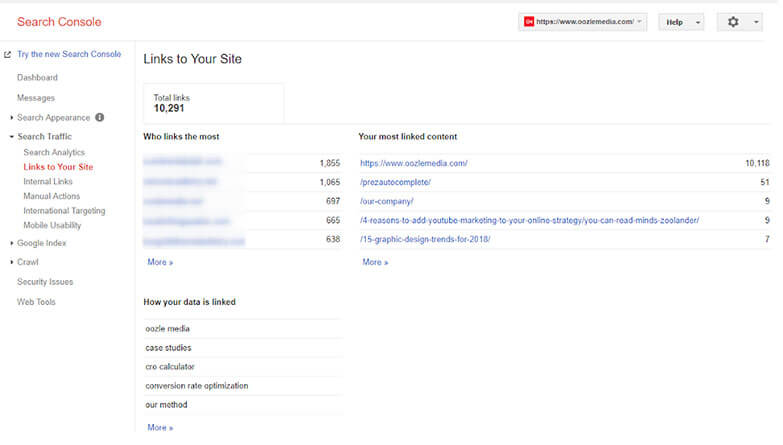
The initial page you land on for this page doesn’t really give you a good overview. You’ll have to click into the “More” sections to find usable information.
In the linking domains section you’ll be able to download a list of all the domains linking to your site in a .csv or Google sheets format. If you are looking for the most complete data, I would download the latest links section. The table shows all the linking domains, “more sample links” shows individual links regardless of domain, and “latest links” will show you the same individual links but sorted by the date they were categorized by Google.
As these are only samples, you’ll need to use a different tool like Majestic SEO, Ahrefs, Moz or Link Research Tools to perform a full backlink audit. A backlink audit becomes necessary if your site is under some sort of algorithmic or manual action penalty for having too many spammy links pointing to your site.

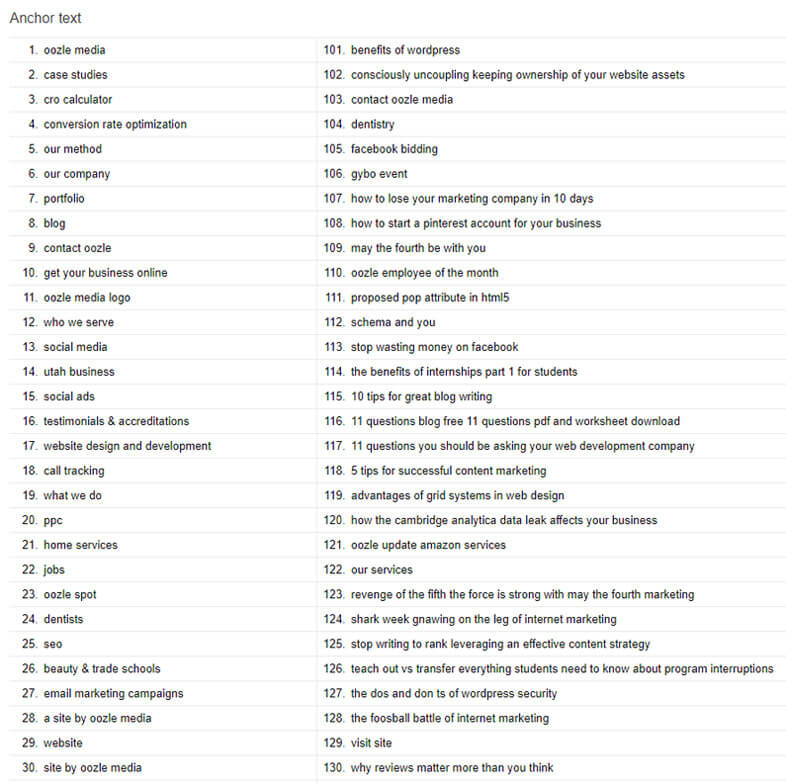
Anchor text will show you a list of the top anchor texts used in the links to your site. This is nice to know, but without the context of where those anchor texts are being used it isn’t that useful.
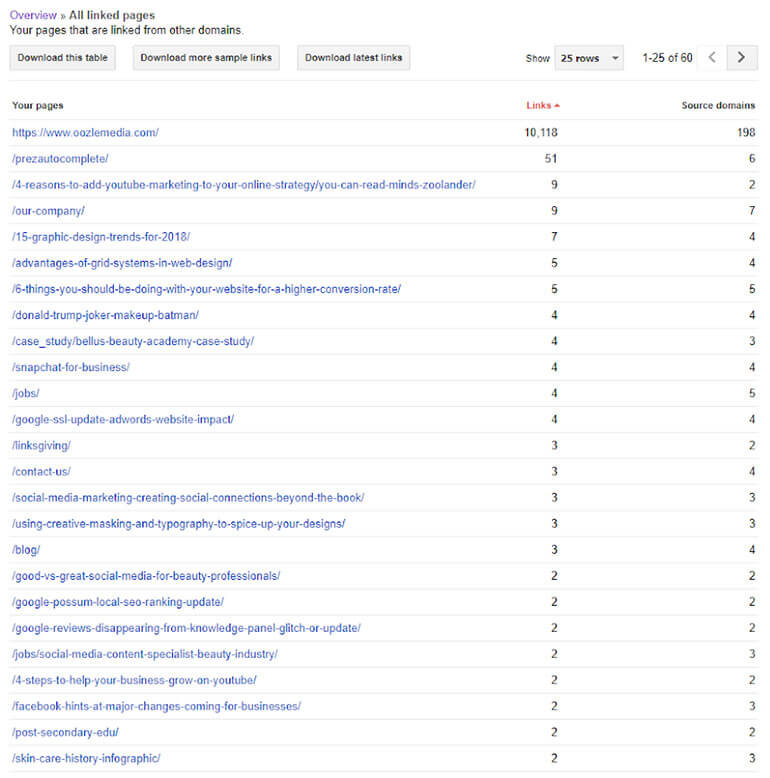
Your most linked content section will give you an idea about which pages on your site have gotten the most external links. Again this is only a sampling of the external links you are receiving, but if you click through the individual links, Google will show exactly where those links can be found. If you are running any sort of campaign geared toward gaining links, you can track some of your success here. It also can give insight as to why certain pages are performing better than others.
If you are wanting to measure the success of full-on campaigns it is generally more beneficial to also track the impact on social media and unlinked mentions as these metrics are gaining more weight in Google’s quest to answer searcher queries with the best answer. We typically use BuzzSumo and Google Alerts to track our campaigns.
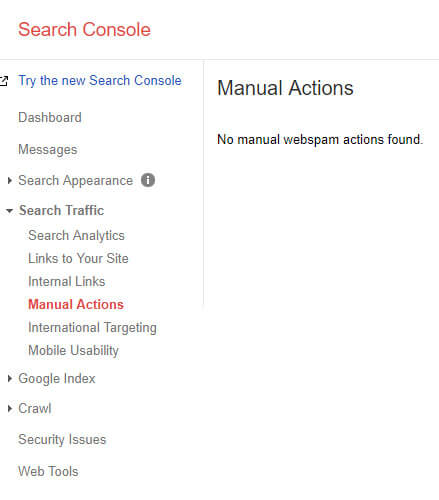
Manual Actions
This is an incredibly important page that you should check on a semi-regular basis. Here is where Google will tell you if your site has been manually reviewed and been determined to violate Google’s policies. If you encounter anything other than “No manual webspam actions found”, you should immediately start taking steps to recover from this as your site will no longer show up in Google searches.
International Targeting
Google is a worldwide web browser and so it is important to let Google know where you intend for most of your website visitors to come from. If you serve multiple countries or in multiple languages this is also a place to inform Google about that as well. If your site serves multiple languages you should be using hreflang tags to ensure that Google is serving up the correct version of your pages based off the user’s browser settings. Moz has a great write up to what they are and how to use them.
![]()
Here you can also set your target country, best practice is to set this for where your main customer base resides. This does not necessarily exclude searchers from other countries from finding your website, but doing this helps Google to increase your chances of serve up your website to this country specifically.

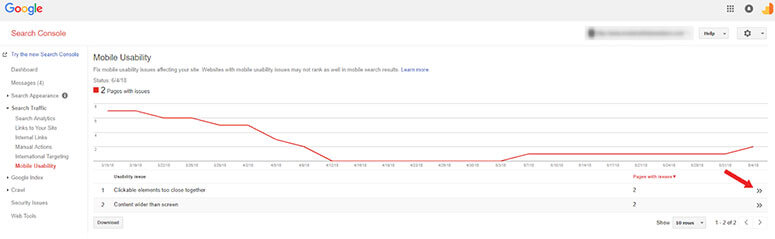
Mobile Usability
Google has switched to a mobile-first index so this section is now an important part of SEO. In a sentence, Google really only cares how your site looks on a mobile phone. Therefore your site content, navigation, user experience needs to be optimized for mobile. Here you can see all the potential problems that Google has found on your site. Click into each section to find a page-by-page analysis of how to fix the problems that arise. Work with a web developer who understands mobile-responsive design and development to resolve these issues.
Google Index
Google’s Index is like a giant library of information. If your site is indexed then that means it shows up in their database and is eligible to show up in the search results.
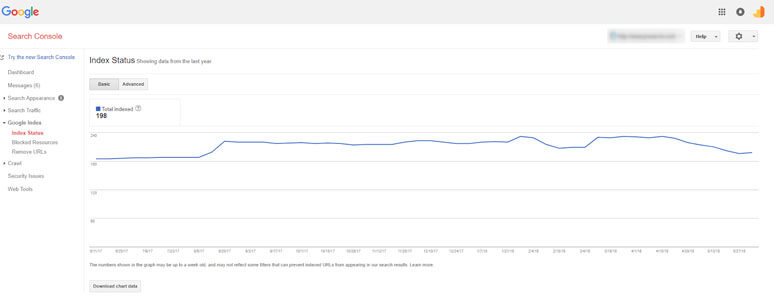
Index Status
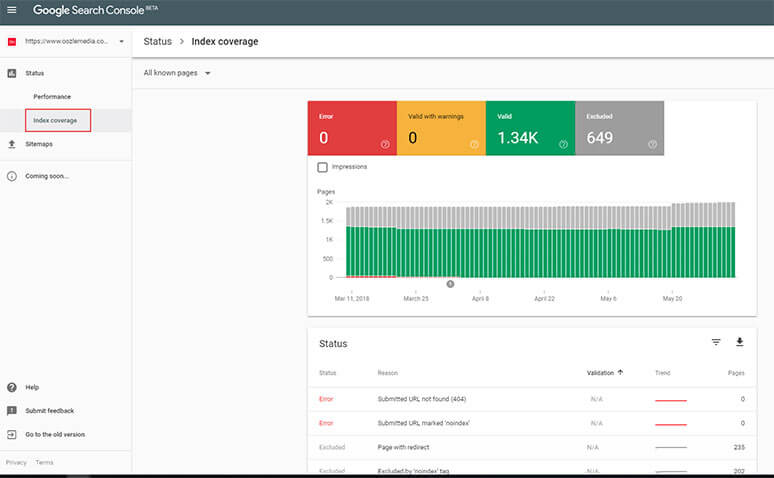
Index Status is a now defunct section that would show the total number of pages indexed and if you have pages that are being blocked by a robots.txt. This has been replaced by the much more powerful Index Coverage Report.
This new report shows exact pages that are indexed, excluded, or have potential errors or warnings. Brian Dean of Backlinko does a fantastic job of covering the different errors and warnings in chapter 2 of his Google Search Console Guide.
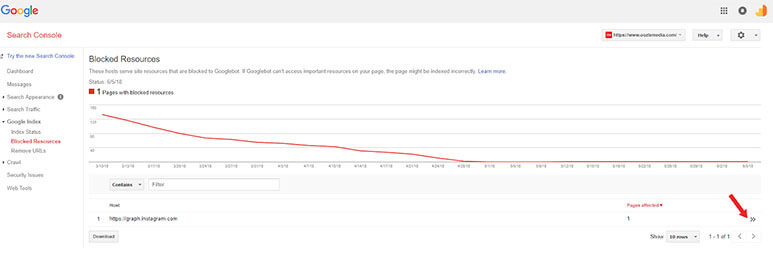
Blocked Resources
Blocked resources is another section that is replaced by the new Index Coverage report. If you’d like you can still use this as a resource to find potential images, downloads or other resources that are being blocked. By clicking through you can find the exact pages that have problems. We recommend using the Index Coverage Report now as it is much more thorough than blocked resources.
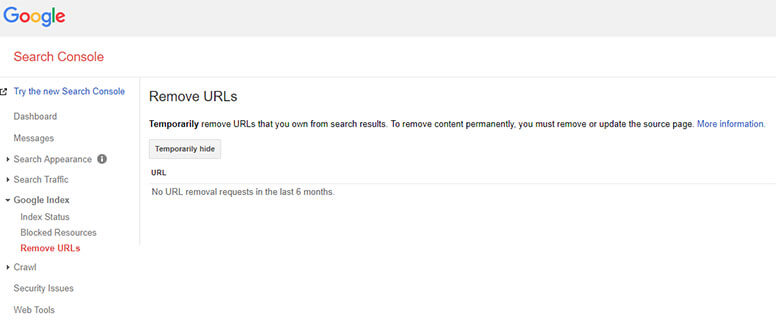
Remove URLs
If you ever have a need to remove a URL temporarily from the search results you can use this section here. It is very rare that you would need to use this part of Google Search Console. A removal is only active for 90 days. After that Google will attempt to index the page again. If you have a need to block specific URLs from being crawled you should consider using the robots.txt and/or a no-index tag.
Crawl
This section deals with how Googlebots crawl the internet and discover your pages on your site. Googlebots use an algorithmic process to systematically crawl, index and rank your site’s content. They will visit each website, detect links on the page and use those as navigation to discover all the pages on each site.
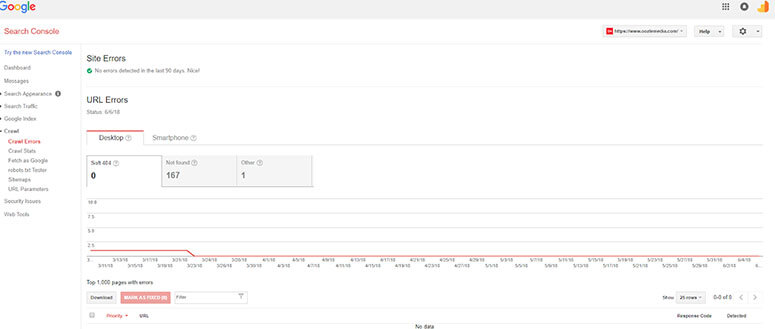
Crawl Errors
This section is also being replaced by the Index Coverage report. It is used to find 404 errors, which once found, should be redirected to live pages to improve user experience. 404 errors do not directly count against you in Google’s algorithms, but can hurt user experience since the visitor to your page cannot do so now. Redirecting these pages to appropriate ones can enhance user experience. For external links, it would recover those pages to count in the algorithm.
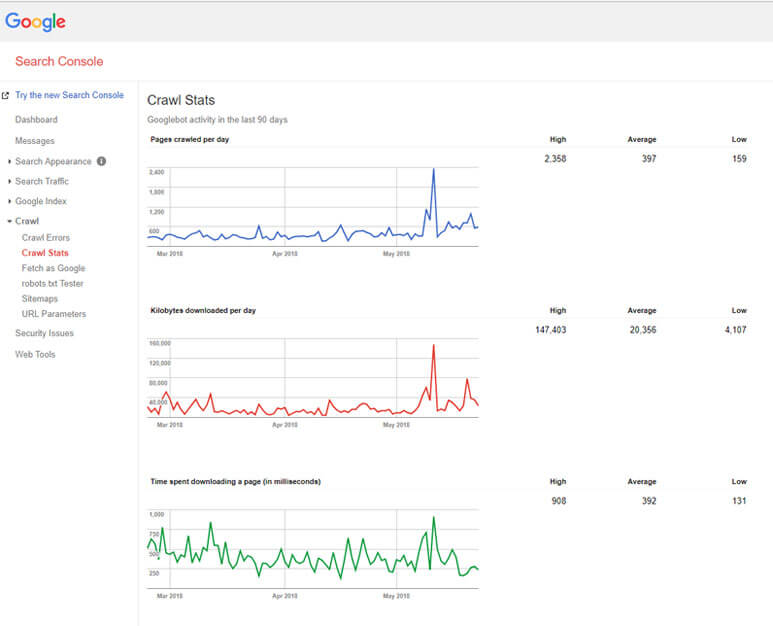
Crawl Stats
At first glance, this page may not appear to be that helpful, but it does give a lot of added insight as to how Google visits your site. Neal Patel has an excellent write up on how to read and interpret these graphs. In essence, you want to see a very straight, horizontal line as much as possible, without dramatic peaks or drops. Generally all three graphs should look pretty similar to one another.
If you do see abnormal peaks or periods of inactivity it could be an indicator of problems. Sudden drops tend to be cause by broken code, robots.txt blocking problems or you aren’t updating your content consistently enough. Sudden spikes are usually caused by adding tons of content to your site or robots.txt could be allowing robots to crawl too much of the site.
For the vast majority of websites, crawl stats are relatively unimportant because you don’t have to worry about what are known as crawl budgets. Each website has a limit on how many pages Google will crawl in a day to make sure they don’t overload your servers. Generally speaking bigger sites with more clout will have a bigger crawl budget.
This can become incredibly important if you are an eCommerce site. eCommerce sites tend to have a lot of variation between each product listed, each with a unique URL. If you spend all your crawl budget on unimportant variables for a product instead of the core pages of your site, it may get updated in Google’s index less frequently and thus harm the website overall.
Fetch as Google
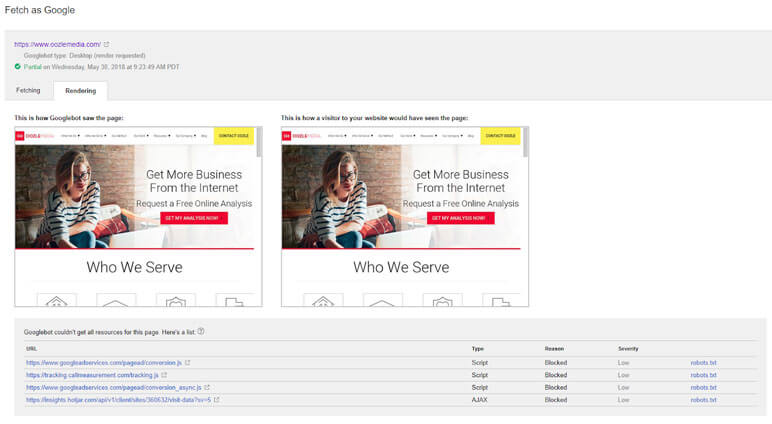
Fetch as Google will pull up how a robot views your site vs how a site visitor will see your site. It will also show you what parts of your page are blocked from a Googlebot. There is often a good reason to block certain things from a Googlebot, but it could also be an indicator of problems, you’ll have to tackle that on a case-by-case basis. When you first setup your site you’ll want to execute a fetch and render to request indexing by Google. To do this you’ll want to leave the text field blank in order to fetch the home page. You should also push the Fetch and Render button, indicated by the red arrow.
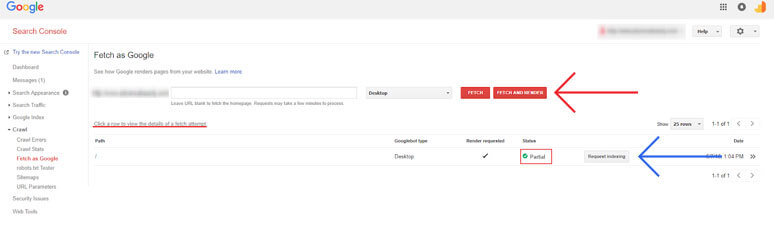
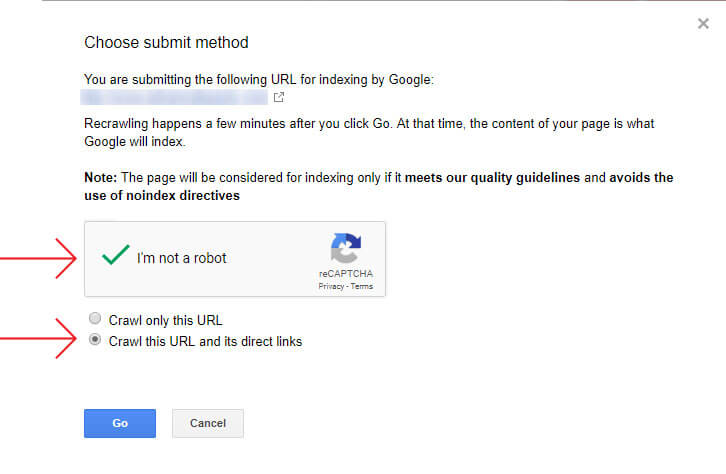
After a few minutes a Googlebot will go pull the page for you and it will give you some basic information here. Under “status”, it may show a few different messages: complete, partial or blocked. If it is complete, you don’t need to worry about anything! Click the “Request Indexing” button indicated by the blue arrow and you’ll come to a pop up screen. Fill out the reCAPTCHA request and tell Google to “Crawl this URL and its direct links”. This will send a request to Google, within the next few days it will crawl and index your entire site.
If it says “partial” you’ll want to check if any important resources are being blocked. Click on the row to show the results. From here you can see the full list of blocked resources as well as how the pages are seen both from a bot and visitor perspective. If there is something blocked that shouldn’t be, you’ll have to troubleshoot it.
You can also use the “mobile fetch and render” to help with troubleshooting. As mentioned earlier, Google is using a mobile first index. If there are still problems with resources being blocked that shouldn’t be, you will definitely need to troubleshoot here.

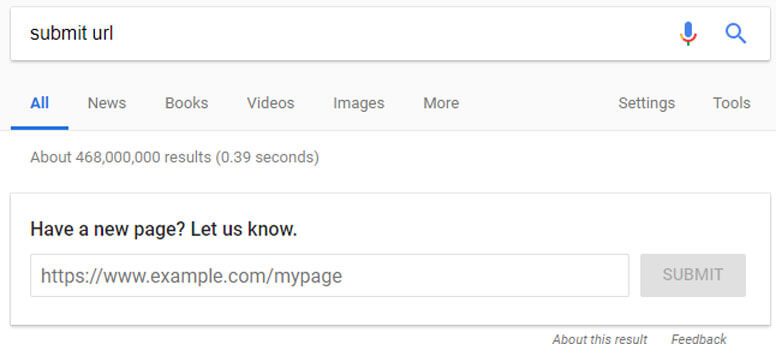
Pro Tip: You can submit URLs directly to Google to request indexing for your new content by performing a Google search query “submit URL”. Google will try to crawl the page right away, although that doesn’t necessarily mean that it will start ranking right away. There is a limit to how many you can submit this way and there is a limit on how many you can submit using the Fetch as Google tool so use these wisely.
Robots.txt Tester
Here you can see a preview of what your robots.txt looks like. A robots.txt file instructs web robot on how to crawl their website. There are particular directives that allow or disallow a robot from going through the site. Generally speaking, a well-optimized robots.txt should indicate where the site map is located and any pages you don’t want found. This is another section when you first set up Search Console that you should check once in a while..
A robots.txt MUST go in the main directory or root domain of the site e.g., www.example.com.com/robots.txt or else the robots will assume the site doesn’t have one and it will crawl everything on the site.
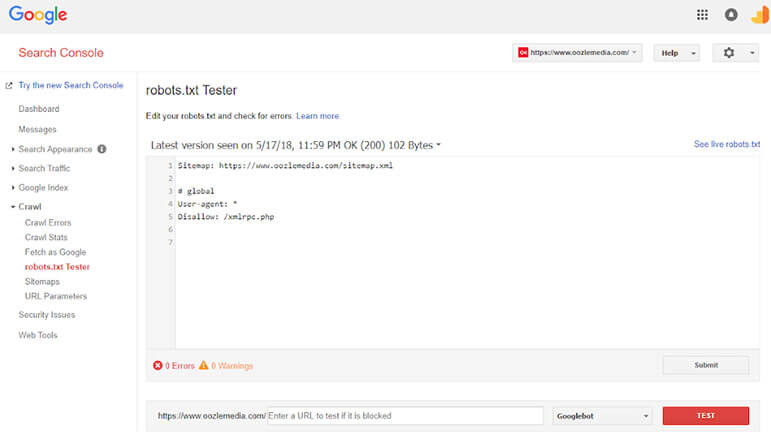
If you suspect that your site or specific pages are being blocked you can always check them in the bottom section by plugging in the specific URL. It is incredibly important NOT to block core pages of your site or else they will never show up in the Google Search results.
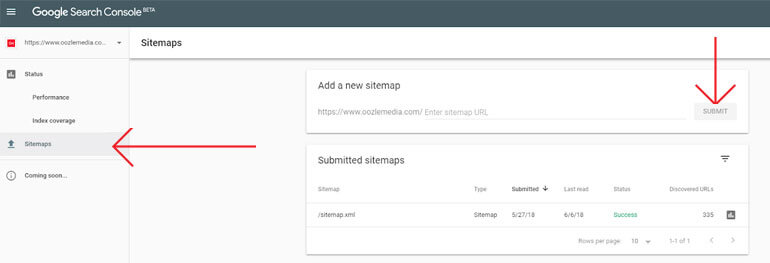
Sitemaps
This is also on the new Google Search Console and, for now, you can add a sitemap.xml to either one. To submit, simply enter the URL into the indicated areas and come back later to check if the right amount of pages have been indexed. A sitemap is a file that lists all the web pages of your site telling search engines how your site’s content is organized. If your site is properly linked, web crawlers can get by without it, but we wouldn’t suggest you risk it. Submitting a sitemap ensures that crawlers know every page on your site and will get to them.

URL Parameters
Most sites will never have to deal with URL parameters, because they do not have enough minor variation style URLs.
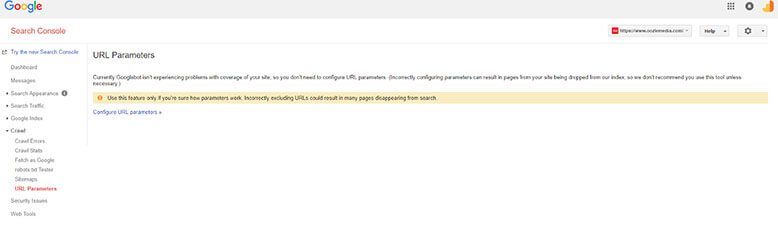
This is, once again, more of an eCommerce site problem. Essentially, you will set up parameters to tell Google which URLs they don’t need to follow in order to maximize your crawl budget. Brian Dean’s write up for Backlinko is really easy to follow, we suggest reviewing it if you have the need, but generally speaking most sites will not need to do this.
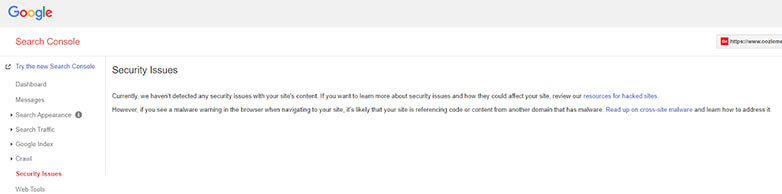
Security Issues
Typically Google will detect and alert you about any security issues they find. If you encounter one, follow their instructions to avoid that very serious “manual action penalty”.