8 Key Areas For Beauty Retouching Using Adobe Photoshop
Beauty Photography is an exquisite genre, but is also one of the more difficult and tedious for image editors, graphic designers, and retouchers to master. Photography, lighting, design and retouching have to be at their best to really make the image shine. There are a number of ways to achieve these results, often it comes down to preference. I will list the tools I have found to be most helpful for myself and other image editors and designers. By utilizing these tools in Photoshop you, your graphic designer or marketing company can produce better images. Even if you are not in the beauty industry, this list is helpful for any business using images in digital media.
1: SYMMETRY
When retouching a beauty image, first look for symmetry. The more symmetry a face has, the more visually appealing it is to the eye. Look closely at the facial features. The eyes, eyebrows, lips, nose, chin and jawline are most often where the symmetry lies. Make sure you even out the left side of the face with the right. Most often, these changes are very minor, you may not even touch them at all but it can make a huge difference. Take time to even out or fix any makeup asymmetry as well. The Liquify tool is the best choice for this area.
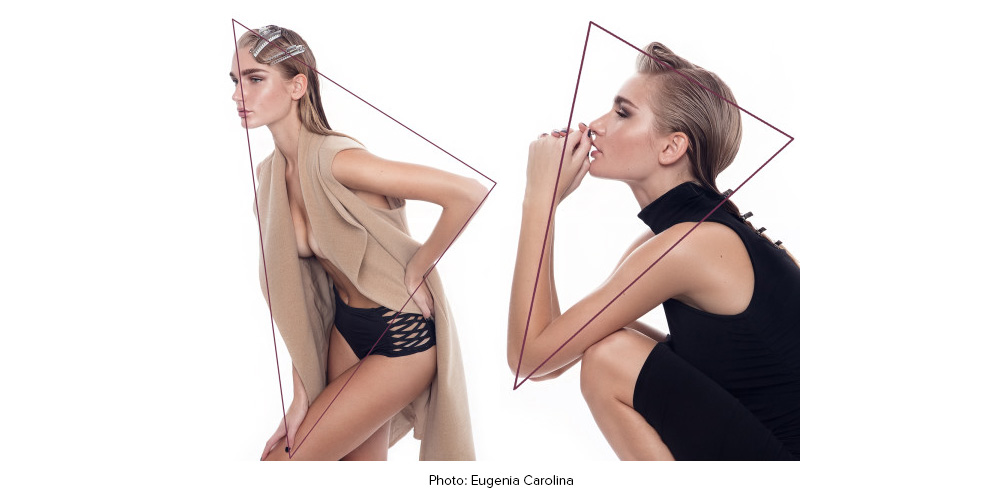
2: SHAPES, LINES, & CROPPING
An interesting photograph or image always has lines and shapes within. Some are more static while others more dynamic. These lines can also create invisible pathways which are great for drawing attention to your message. The eye is easily distracted by line breaks, it cleans the image substantially when we straighten or curve any shapes and lines we see. Look to the silhouette, shoulders, neck, pose of the model and the shapes and lines It’s creating.
Cropping an image is also an important step to editing photos. How you crop an image can have a huge visual impact on the final design. Don’t forget to follow the “Rule of Thirds.” photographymad.com states that the “Rule of Thirds” is the basic principle that involves mentally dividing up your image using 2 horizontal lines and 2 vertical lines. Then you position the important elements in your scene along those lines, or at the points where they meet. The idea is that an off-center composition is more pleasing to the eye and looks more natural than one where the subject is placed right in the middle of the frame.
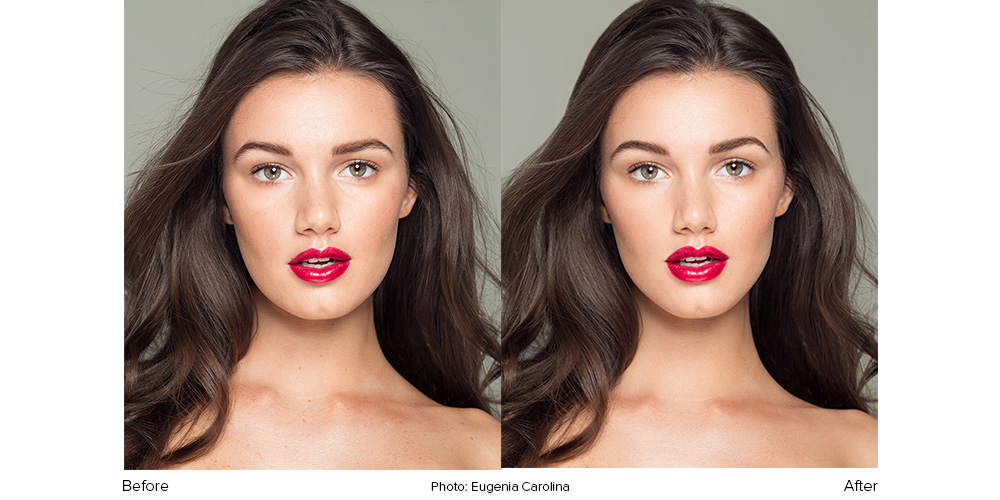
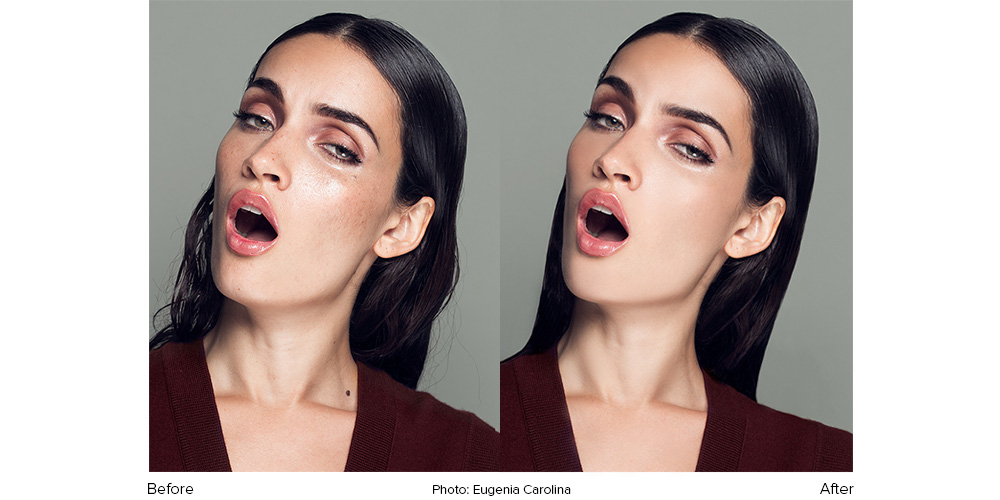
3: SKIN BLEMISHES & FINE LINES
The skin is absolutely vital to a great beauty image. The key is to even out and perfect the skin without getting rid of the skin texture, in order to avoid looking too airbrushed. The spot healing brush, healing brush and clone stamp tool are best for this step. Most designers will favor the spot and healing brush. In addition, you can sample similar texture in the skin with the healing brush tool to even out or take away fine lines and blemishes. You can even do this with unwanted hair strands that go across the face. Again, look for makeup errors to even out as well. To smooth skin and even skin tones, there are a number of various plug-ins available to achieve great results. A quick way to smooth skin is to use the mixer brush tool. I use the following, Wet: 5%, Load 8%, Mix 10%, and Flow 10%. I have found that these settings achieve a natural look without looking too airbrushed. It is easy to overdo it so watch yourself. As always, work non-destructively.
4: CLONE STAMP FOR HAIR
Hair is just as important as the skin. There will always be flyaway hair strands that need to be taken care of. The Clone Stamp tool works great for this type of retouching work. Clone Stamping in Normal, Darken and Lighten modes as well as various opacities will take care of evening out hair. Clone Stamp in Darken mode will affect the lighter strands against darker hair, lighten mode will affect the dark strands against lighter hair. For body and facial hair, healing brush tool is a great choice. Healing Brush in Lighten mode is great for taking away body hair. The Clone stamp tool in Lighten mode and 20% opacity is great for getting rid of bags under the eyes without losing them completely. For a natural look, it is always important to diminish not take away.
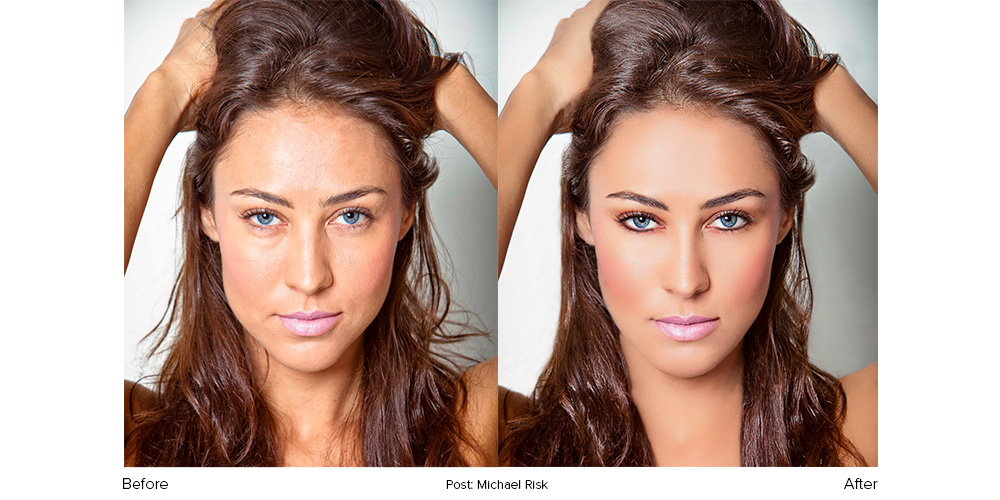
5: DODGE & BURN
One of my favorite tools – dodge and burn – can correct tones as well as enhance highlights, shadows and form. Here you can fix hair and skin unevenness further and pronounce areas of the images you’d like to, as well as accentuate makeup or jewelry. For best results and to work non-destructively, create a new layer and fill that layer with 50% gray. Set the blending mode to soft light and use the dodge and burn tools on this layer on top of the image you are retouching.

6: CURVES & LEVELS
Curves
In general, curves are a bit more user friendly, and will allow you to make more dramatic changes than levels. With the ability to change things drastically comes the ability to either really mess an image up, or make it great.
Here is when I will use Curves:
• Adjusting the colors of highlights, midtones and shadows
• Adjusting very specific values (Using the Hand)
• Creating Vignettes (Pull RGB up in center slightly)
• In compositing, often you will need to change colors, lights and darks to make an image fit. Curves handle this very well
• Adjusting specific RGB/CMYK values
Levels
Levels are perfect for large global adjustments such as making the lights of an entire image a little less bright. They are a bit more subtle than curves.
Here is when I use Levels:
• Making subtle changes
• Adding slight color to highlights and shadows
• Making white levels slightly darker so things don’t look blown out

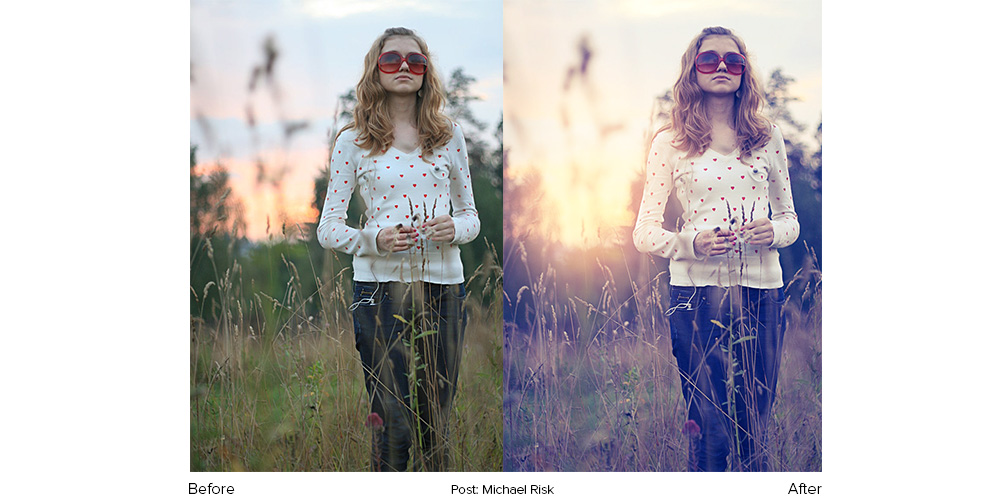
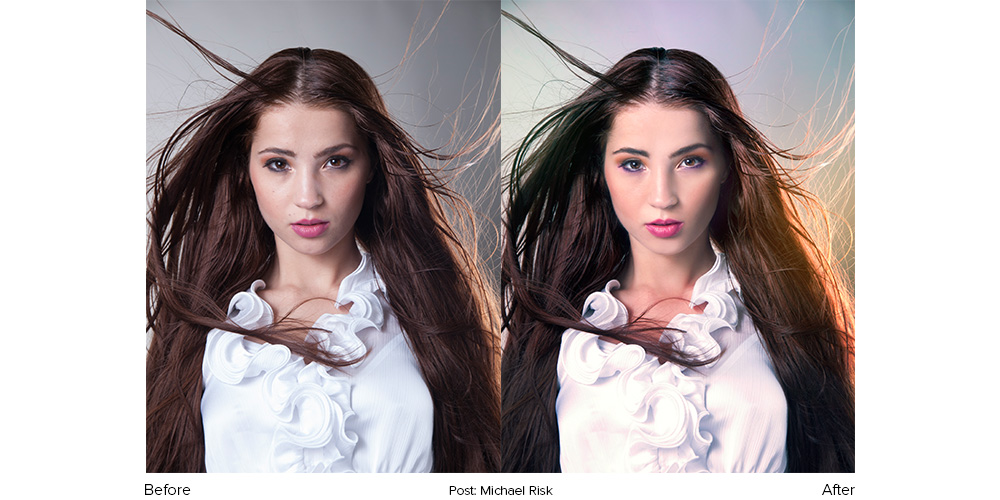
7: COLOR TONING & CONTRAST
Color correcting skin and hair issues is a must, but color toning is an artistic choice for the image. Pushing the colors cool or warm will have different effects, same as the saturation and contrast of an image. Hue, Saturation and Luminosity are the 3 components of color theory, and they are all powerful tools in provoking mood and feeling. To achieve these results utilize the various adjustment layers. You can also adjust RGB in curves to achieve various effects. Creating a new layer and setting your blend mode to screen, you can create sun flare effects using your paint brush and the color picker.
8: APPLYING DIGITAL MAKEUP
Nothing can replace real-life makeup, but if you want to try applying digital makeup, it’s not hard to get convincing results. The key is to apply different colors to separate layers, each one set to the Color Blend Mode with a low layer Opacity. This makes it easier to give the effect depth, and it gives you greater control if you need to tweak or erase anything. With Photoshop’s excellent Brush Panel, it’s also quick and easy to apply scattered glitter. Of course, once you’ve completed one eye, you can simply copy the effect and flip it to cover the other eye. Some things to consider: Retouch according to what best compliments your subject’s specific features, make sure the colors are synonymous with the mood and aesthetic you’re shooting for, decide what to add or subtract from preexisting makeup, and always improve the clarity and intensity of your work through layer adjustments. Most of your models will have makeup on already, borrow the colors and adjust from there.
NEED A GRAPHIC DESIGNER?
Contact Oozle Media to find out how you can utilize our Graphic Designers to create artwork for your marketing materials.